How Easy is It to Change Web Host
Figuring out how to switch web hosts tin can exist a daunting job. In that location is a number of reasons why y'all should, though.
Where you host your website influences many things – security, site speed, and backups. Additionally, there are many types of spider web hosting, and yous need to make sure you pick the right one for your needs.
If your electric current provider no longer fulfils them, it'southward fourth dimension for a alter.
How do y'all motion your site from one host to another? That's exactly what nosotros volition talk about in this review.
Prepare? And so let's get going!
Gather Your Resources
To brand the switch from one web host to some other, you volition demand the following:
- Admission to both hosting accounts — During the procedure you lot will take to make some changes to both your erstwhile and new hosting accounts. If you are not sure about your login credentials for either, now is the time to find out.
- Access to your database — Moving from ane web host to another requires access to your website'due south database. This often happens in the administration expanse of your hosting business relationship, which means that in that location is one more than reason to make sure you know how to get there.
- FTP customer — Every instance we are discussing beneath, requires moving data from or to an FTP server. For that, y'all need an FTP customer. A great complimentary selection is FileZilla, only you tin can use whatever client of your pick.
- Text editor — Y'all also need a code editor to change important files. One of the best options is Notepad++ (it'south likewise free) only you can become with whatever you want.
Got everything together? Cool, then allow'southward jump right into how to switch web hosts for your WordPress site.
Moving Your Site from One Host to Another Manually
We will start off by making the switch manually. If you are looking for a solution that uses a WordPress plugin, simply scroll downward further.
Good to know: Even though we are going to testify yous how to switch spider web hosts for your site manually, at that place are many WordPress hosting providers that offer gratuitous or paid site transfer/migration, and so you don't have to do it yourself. Bank check out our list of the Best WordPress Hosting Providers, to see which ones offer site migrations.
i. Sign Up to a New Web Hosting Provider
The kickoff pace of switching spider web hosts is to cull a new hosting provider and sign upwards with their plan.
As we mentioned to a higher place, some WordPress hosting providers also offering site migration. This can be especially handy if you lot're non very tech-savvy or just desire to relieve time. During this step, you should also decide whether yous desire to utilise a migration service or proceed manually.
2. Backup Your Files
Next up is to back up your website files. This will likely have the longest time, so let'due south commencement with that. Pace one is logging into your FTP server. Just burn upward the FTP client nosotros talked about, insert your credentials, and connect.
After that, observe the root directory of your WordPress site (if information technology'due south not your landing page by default) and marking all the files.

Annotation that your website might contain files that are not visible past default (such as .htaccess). Therefore be sure that your FTP client displays those files every bit well. In FileZilla, you will find this option under Server > Force showing hidden files.
One time yous have marked all files, copy them to a directory on your estimator. Depending on the size of your site, this might have a while so nosotros can move to step two meanwhile.
3. Export the Database
The database is the third role of your website. The style you get access to information technology differs from host to host. In nigh cases you finish upwards in phpMyAdmin:
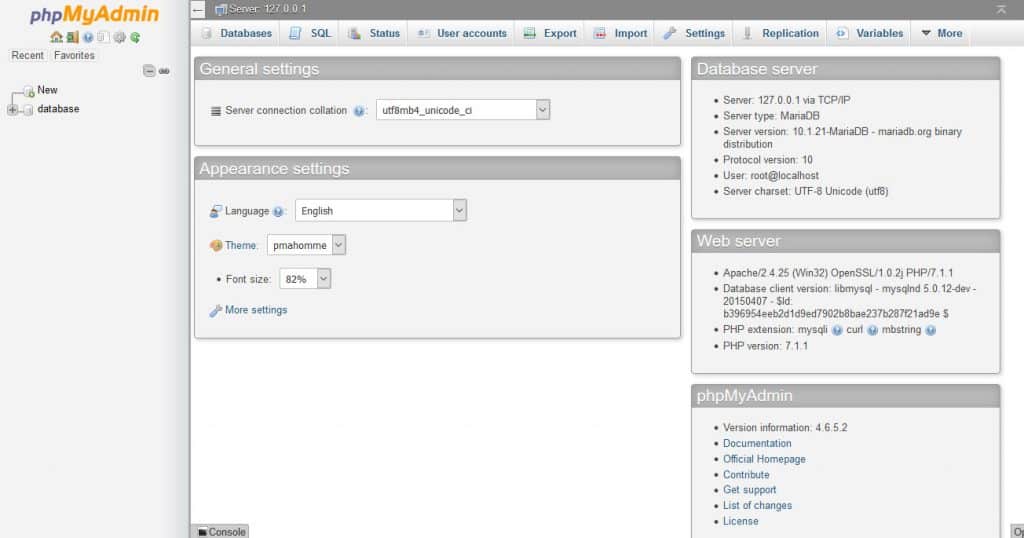
Select the database you lot want to export from the left. If y'all don't know which one that is, only check the wp-config.php file of your current website where it says:
define('DB_NAME', 'database_name_here'); This will tell you lot the name of the database your site is using.
After that, get to the Export tab.
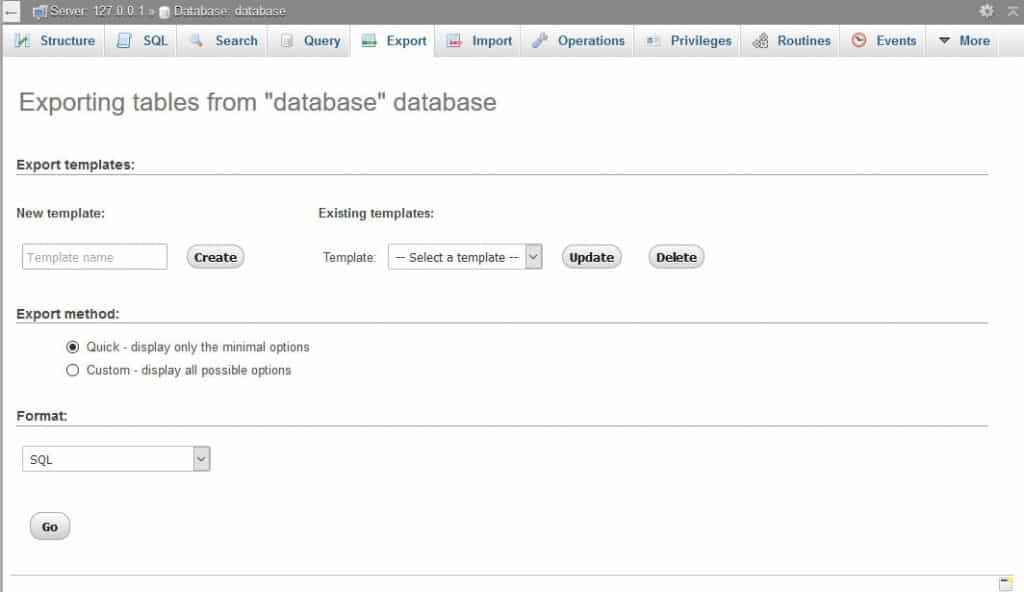
Choose Custom nether Export Method. In the carte, make the post-obit choices:
- Format — Leave as SQL.
- Tables — Mark all the tables y'all want to consign. Ordinarily, it'south all of them. Disable any if you have a good reason for that (e.chiliad. if yous host databases for several sites with unlike prefixes).
- Output — Fix Pinch to zipped or gzipped to make the download faster.
- Format-specific options — Leave everything as is.
- Object cosmos options — Make certain to select Add DROP Tabular array / VIEW / Procedure / FUNCTION / EVENT / TRIGGER.
- Data creation options — Leave everything equally is.
When you are done, clickBecome at the lesser. This should issue in a file download. Salvage the compressed database to your figurer and move on to the adjacent step.
four. Create a Database at Your New Host
Now it's time to create a new home for the database you simply exported. Go to your new host and log into your account. Detect the section that deals with MySQL databases.
Create the following:
- A new database
- A database user with full privileges to that database
- A secure database user password
Note down all three, you will need them soon. Besides, observe out the name of your MySQL server. In many cases, this will be localhost simply check with your hosting provider to be sure.
5. Edit Config.php
By now, your website files should have finished downloading. If that is the instance, it's time to go to the directory where you saved them and find a file called wp-config.php.
It's an important system file that, among other things, controls the communication between your website'southward file system and the database.
The first matter you lot should practise is make a copy of the existing file and store it somewhere safe. Subsequently that, open the original with your text editor and discover the following section:
define('DB_NAME', 'database_name_here'); /** MySQL database username */ define('DB_USER', 'username_here'); /** MySQL database password */ ascertain('DB_PASSWORD', 'password_here'); /** MySQL hostname */ define('DB_HOST', 'localhost'); Supersede where it says database_name_here, username_here and password_here with the database proper name, username, and password you created before. Notation, that in your case it won't really say database_name_here etc, but will incorporate the information of your current host. Those will be in the same position.
Additionally, brand certain you insert your MySQL server data in the place of localhost (or leave information technology as is if your hosting provider uses localhost for this setting). When you are done, save the file.
6. Upload Your Files to the New Host
One time all of that is finished, you tin can start the process in a contrary direction. The showtime step is to upload your files to the server at your new hosting provider. It will likely take a long time so we can start information technology and do other things while it'southward running.
By now, yous know the drill. Fire upwardly your FTP customer and this time connect to the new server. A quick caveat: Usually yous would use the site URL in order to connect via FTP. In this instance, the domain is nonetheless pointing to your old server, so information technology won't work.
There is a workaround, which is using the IP address of your new server instead. You can usually find this in your hosting business relationship. If not, exist sure to contact support – they should be able to help you out.
When yous are done, find the files you downloaded earlier and upload them (including the modified config.php file) to the root directory. In one case the upload is running, move on to the next step.
vii. Import the Database
Meanwhile, we can accept the time to import the database. For that, log into the database assistants tool on your new server. We will assume it is phpMyAdmin again.
Select the database, y'all created earlier from the listing and choice Import at the top of the screen.
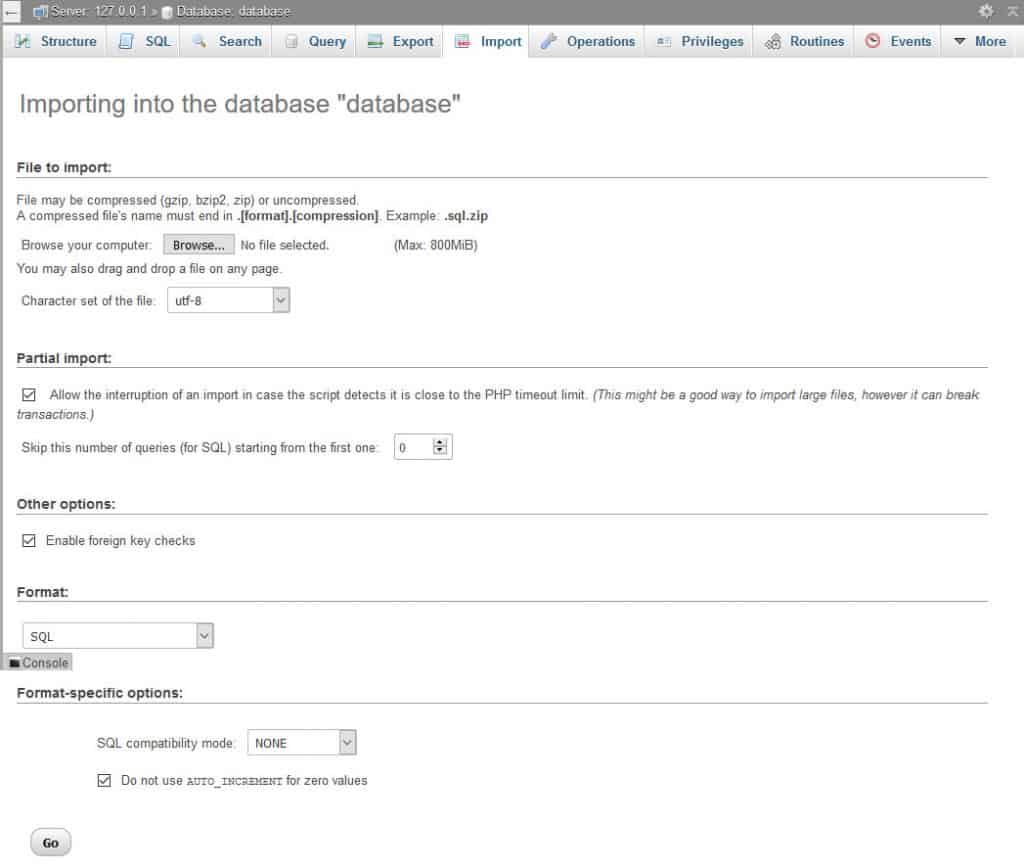
Click the Browse push and select the file yous exported before. After that, roll downward to the bottom and click Become. The import volition then start.
The time it takes to finish depends on the size of your database. Y'all volition receive a success message when information technology'due south washed.
Optional: Replace the Old URL in the Database
If you are not only moving your site over to a new spider web host, but also changing your URL, there is one extra step. In this case, you lot need to replace references to your former URL in the database with the new one. If you don't, all sorts of things volition get wrong!
There are several ways to do this. The easiest I take plant is the Search Supplant DB script. Yous can download it for free (in exchange for your e-mail accost). Just upload it to your website directory (in a cloak-and-dagger binder) and navigate there using your browser.
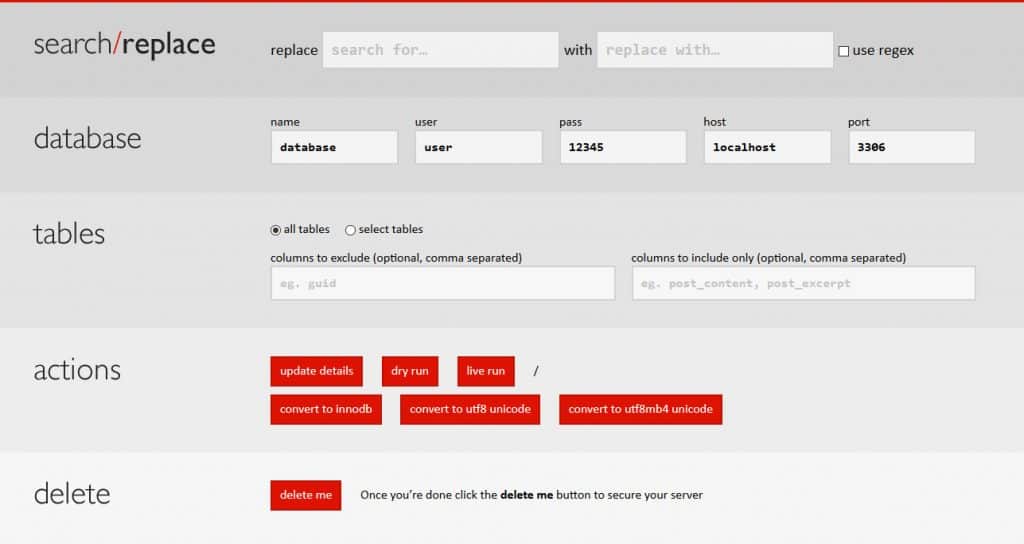
Simply insert your one-time and new URL in the fields on top. Everything else should commonly stay as-is. Use the dry run button to test everything. When everything looks adept, do the live run.
Of import: Under no circumstances should you leave the script on the server once you are washed. Information technology's very powerful and tin practise real damage to your site if someone else finds it.
Should the script not work for y'all, you lot can besides supplant the URL via SQL commands.
8. Change Your DNS Server
When you are washed with all of the in a higher place, it is fourth dimension to put your URL on the new server. That means changing your DNS server settings.
The process depends on where your domain is registered. For case, if you registered with your onetime hosting provider, the best idea is to transfer the entire domain to the new provider. Talk to the support almost how to do that.
If y'all have bought it from a domain registrar like Domain.com, you need to update your nameserver settings. You will need the nameserver addresses of your new host. They ordinarily wait something like this:
ns1.yourhost.com
ns2.yourhost.com
You volition have to connect these with your domain. As mentioned, the process will be slightly different depending on where y'all have purchased it. Here are instructions for some of the well-nigh common cases:
- Domains Registered with GoDaddy
- Changing DNS Servers on HostGator
- How to Change Nameservers on Domain.com
Talk to whoever is in charge if yous need assistance. Once done, exist aware that it tin can take upwardly to 48 hours for the changes to happen. You can apply a tool like What's My DNS to meet if it has finished.
Until so, exist sure not to make whatsoever changes to your site. You lot may be modifying the sometime website instead of the new location.
Once everything is through, your site should be migrated without any downtime. Because both of your sites have the same content, visitors will not notice the change.
9. Cleaning Up
One time the DNS change has gone through, you can become back to your quondam host and delete your site files and database. Yous may desire to await up to a week before doing so to make sure everything works well.
In any case, be certain to go on your local copies (including the original wp-config.php) effectually. At that place may be a need to roll back the migration. In that case, you'll be happy you notwithstanding have them.
How to Switch Spider web Hosts via WordPress Plugin
All of the higher up can exist greatly shortened by using a plugin. It allows you to automate parts of the process. While there are other options out in that location, we greatly recommend the Duplicator plugin. It'south free and makes the process a cakewalk.
1. Install Duplicator
Naturally, the kickoff step is to install the plugin. This requires the usual steps. Log in your WordPress website and navigate to Plugins > Add New. Type the plugin's name into the search box to discover information technology and click Install Now one time information technology appears on the list.

When your site is done downloading, hit the Activate button to be able to utilize the plugin.
2. Export the Existing Site
Once Duplicator is installed and active, you lot will notice a new menu item with its name in your WordPress admin area. Clicking it brings you to this:
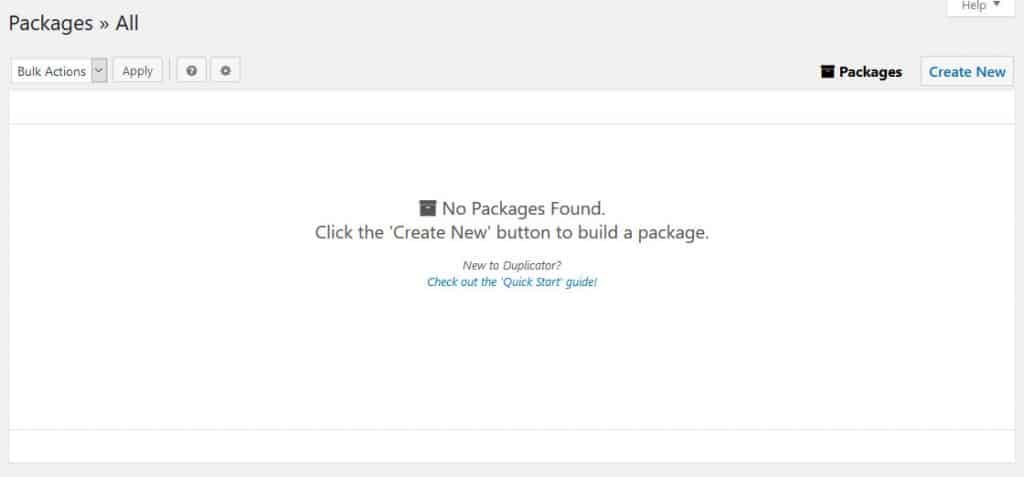
The plugin saves its so-called packages. These are zipped upwards versions of your website and database. Since you lot oasis't created whatsoever yet, the listing is empty. Time to change that. ClickCreate New in the upper right corner to go going.
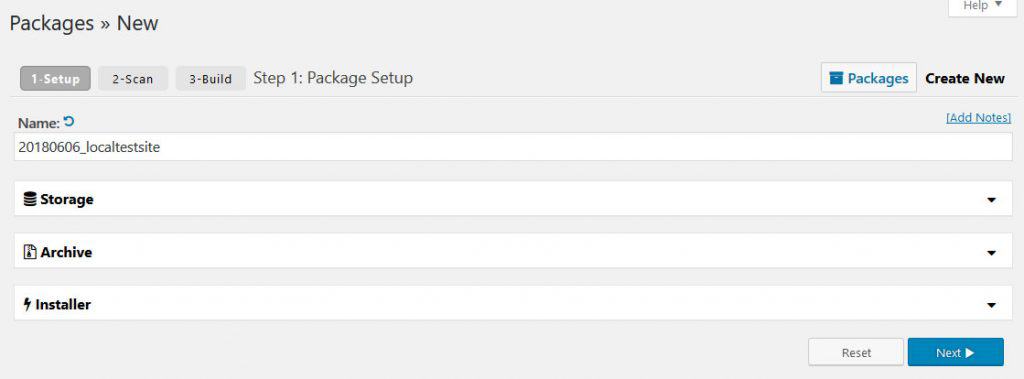
On the side by side screen, yous have several options.
- Storage — You can configure where to store your site redundancy. Be aware that unless you have the Pro version of Duplicator, your only selection is your own server, then there is nothing to do hither.
- Archive — In this section, you may exclude both files and parts of the database from being migrated. Use this if you have adept reasons.
- Installer — Y'all tin can fill in the database data of your new server environment. This is as well part of the later set-upwardly so you can ignore it for the moment.
Nearly likely, you will simply click Adjacent. The plugin will and so perform a system bank check to encounter if it has everything it needs to run properly. You can see the findings once it's washed.
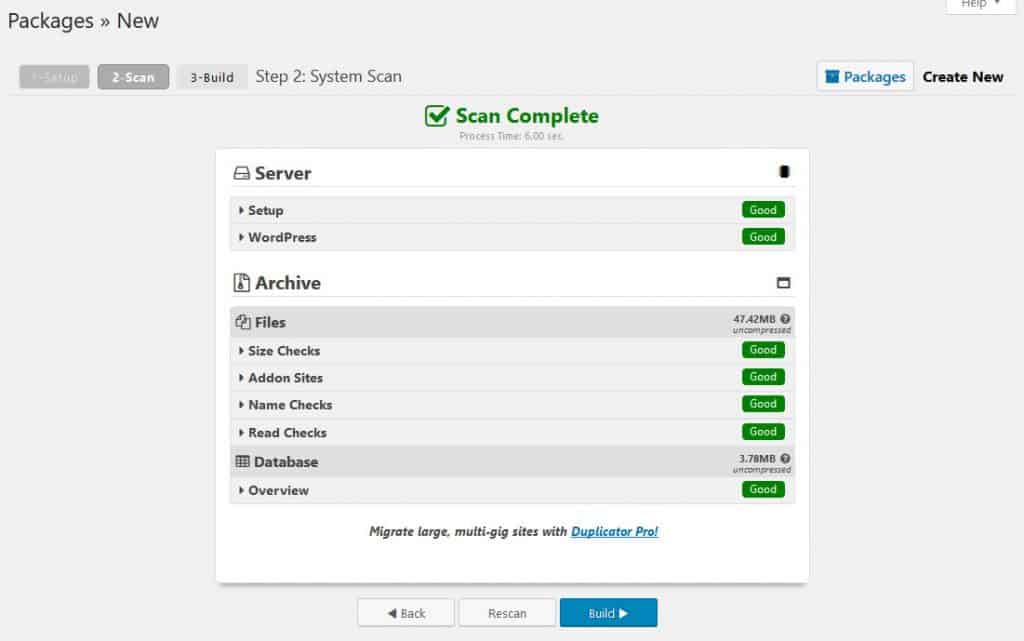
If everything is fine, outset the build process by clicking the button at the lesser. This may accept several minutes so don't close your browser. When it's finished, you volition come across this:
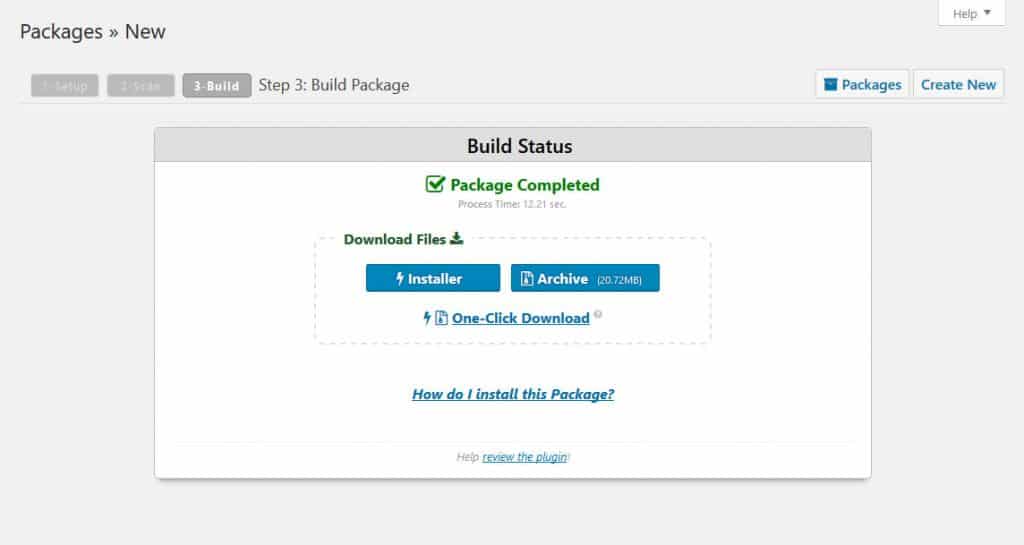
Download both the installer and archive by clicking the buttons separately or with the one-click download link. Well washed!
3. Upload the Files via FTP
The next step is uploading those files to the server. You volition need to use the IP address rather than the domain to connect via FTP.
Once continued, make sure that you lot upload both the installer file and the archive. Place them in the root directory and make certain it's empty beforehand.
iv. Create a New MySQL Database
With the plugin method, you will also demand a MySQL database for your new site. Nosotros take talked about it in detail earlier. Practise what you take to practice in order to stop upwards with a new database, a username with full privileges for the database, and the database password. Exist sure to annotation down the MySQL server your host gives you for your website.
5. Connect to the New Website
For the next step, yous might be running into a problem. To deploy the site, you demand to admission the files on your server via a web browser. That usually happens by typing in the domain name.
If you are using the same domain as before, it is non pointing to your new server still. Of class, you lot could change that to go effectually the trouble. However, this would a) have a while to actually happen and b) will mean downtime for your site.
Luckily, there is a way effectually, which is using your computer's hosts file. You can locally map domain names to specific IP addresses. That manner, you are able to access files on the new server via the old domain without irresolute anything for your visitors.
(If you lot are using a different domain on your new host, you can skip this stride completely.)
The first thing you need is the IP accost of your new server. Your provider should display that information for you. If you tin can't find it, ask!
After that, you demand to open your host's file. Hither'south how to practise that on dissimilar platforms:
- Windows — Open up the taskbar carte, search for "notepad". Correct-click the result and choose "run as ambassador". In one case running, apply the program to open up
c:\windows\system32\drivers\etc\hosts. Make sure you search for "All Files" in order to see the file in question. - Mac Bone — Open the concluding and enter the control
sudo nano /etc/hosts. You might be asked to enter your ambassador password. - Linux — For Linux you can use the aforementioned method as with Mac Bone.
Once you lot have access to the file, you need to insert both the IP address you found earlier and the domain name. It volition end up looking like this:
192.168.1.10 https://yoursite.com
Annotation: the space between the IP address and the domain is a tab. As well, be sure to replace the accost with your server's bodily accost and yoursite.com with your existent domain. Save the changes and you should exist able to access the new server using your existing domain name.
Important: Once you have finished the migration, be sure to change your hosts file back to its original state!
six. Run the Migration Process
Now information technology's time to start the migration procedure in hostage. Navigate to https://yoursite.com/installer.php (insert your actual domain), this should lead you lot to this screen:
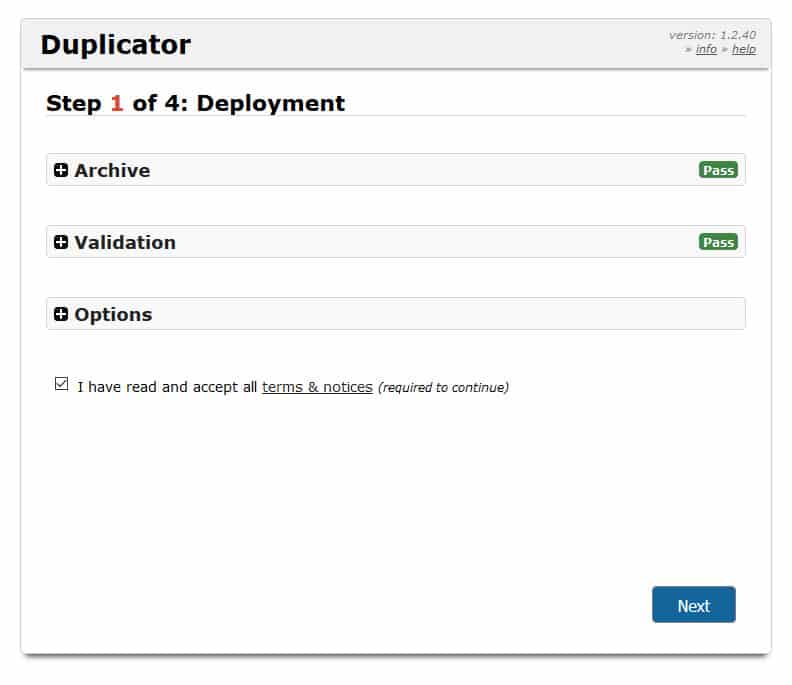
Make sure the installer gives you a Pass for archive and validation, then check the terms and atmospheric condition box and click Side by side at the bottom. This will kickoff the deployment process.
Subsequently that, y'all volition be asked to insert your database host, name, username, and password.
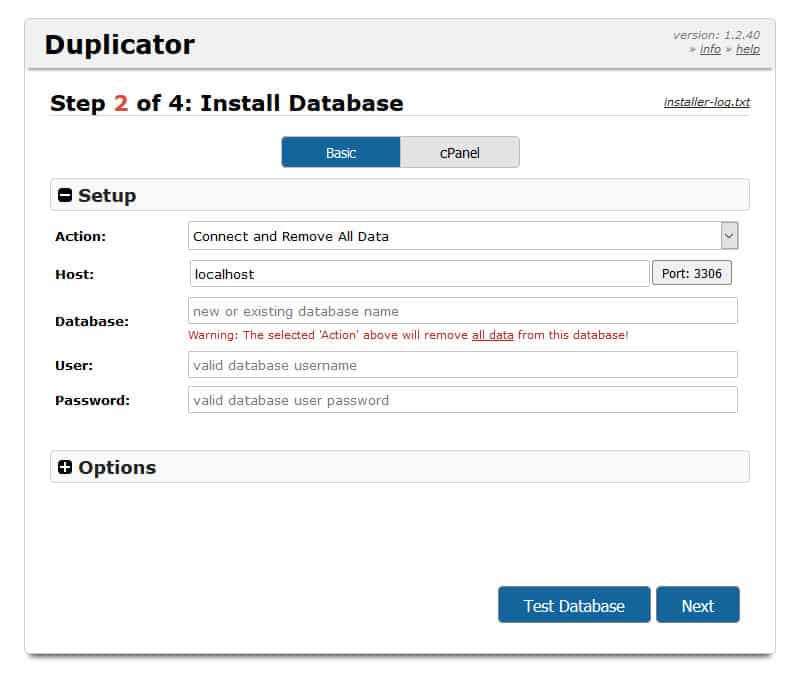
Y'all should accept those at hand from before. You tin can utilise the Test Database button to make sure everything is working. So clickNext once more. The plugin will import the database.
In the adjacent step, you have the run a risk to replace mentions of your old URL with the new one. Make sure the right URL is in the field! Duplicator will then finalize the process.
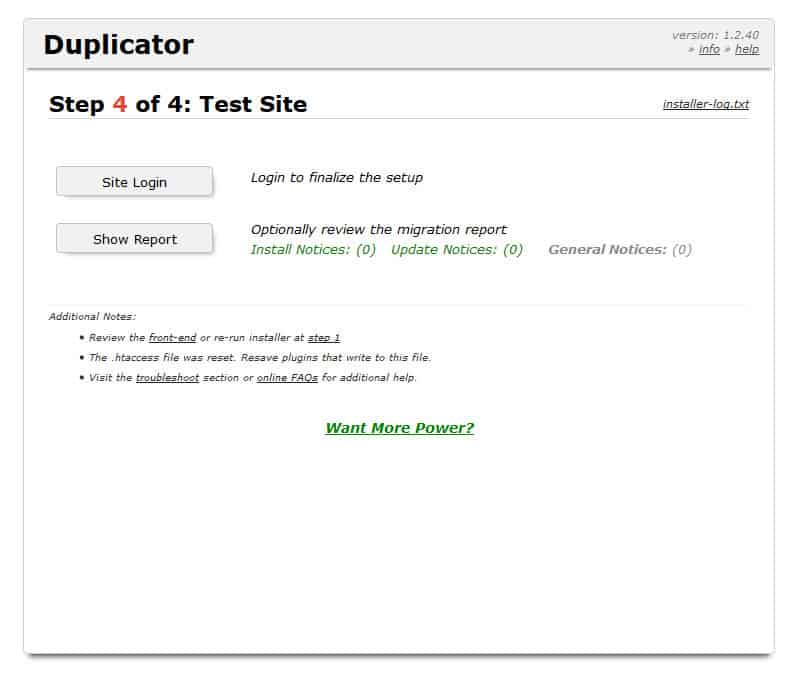
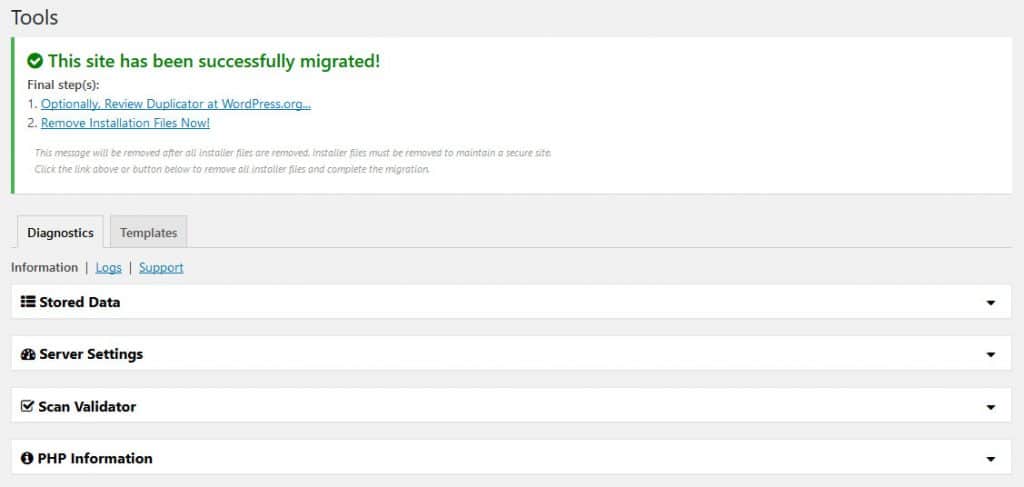
The last screen gives you a link to log into your site and reports if everything went well. Make certain to log in and check if everything is working as it should. Likewise, don't forget to follow Duplicator's instructions to clean up afterward yourself.
7. Update the DNS Nameserver
With this method, y'all still demand to change your domain from your sometime server to the new one.
Nosotros take already talked virtually this in detail to a higher place, and then yous tin can refer to that department. Get the nameserver addresses from your new host and connect them to your domain. And then look until the changes have gone through before making changes to your site.
After that, you are done – congratulations! You lot take just learned how to switch web hosts for your WordPress website.
Switching Spider web Hosts for WordPress Websites in a Nutshell
Switching your WordPress site from 1 web host to another can exist an intimidating task, especially for first-timers. Keep in mind that merely like everything else concerning running your own website, it becomes less difficult when you break it downwardly into steps.
If yous have followed along with the above, you should at present have successfully moved your site to your new hosting provider. Whichever process, you decided on, allow's speedily summarize the basic steps:
- Sign up with a new web host
- Backup your website files and database
- Prepare the new hosting environment for the switch
- Import your files and database to the new host
- Switch the nameserver of your domain
That'southward basically it. Congratulations again for making it this far – well done!
Do y'all have questions or additional tips on how to switch web hosts? Let u.s.a. know in the comments section below.
Previous Chapter: Best Hosting for WordPress
Next Affiliate: Beginner'due south Guide to cPanel
Source: https://websitesetup.org/how-to-switch-web-hosts/
0 Response to "How Easy is It to Change Web Host"
Post a Comment